Implementing a two-tier architecture in AWS using Terraform
Week3 of #100weeksofcloudops
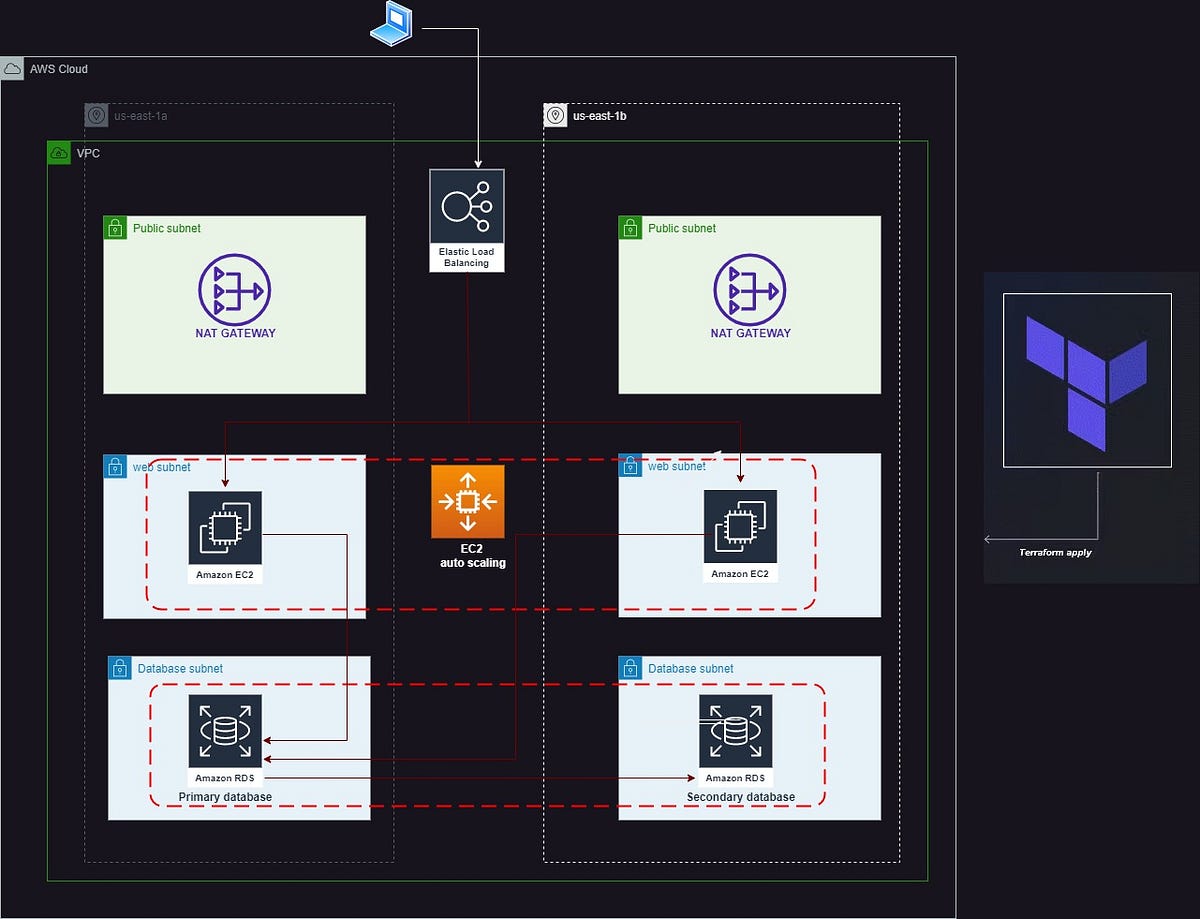
Two-tier architecture
Two-tier architecture, also known as client-server architecture, is a software design pattern that divides an application into two main parts or tiers: the client tier and the server tier. Each tier has specific responsibilities and interacts with each other to provide functionality to end-users.
Architectural diagram
Terraform
It is an open-source Infrastructure as a code tool. It enables you to build, change, and version resources in the cloud. You can work with multiple clouds using Terraform.
Prerequisites
AWS account with IAM user access key, secret key and a key pair.
An IDE, I am using VS code.
AWS CLI and Terraform installed
Steps for creating 2-tier architecture
- Install Terraform from here.
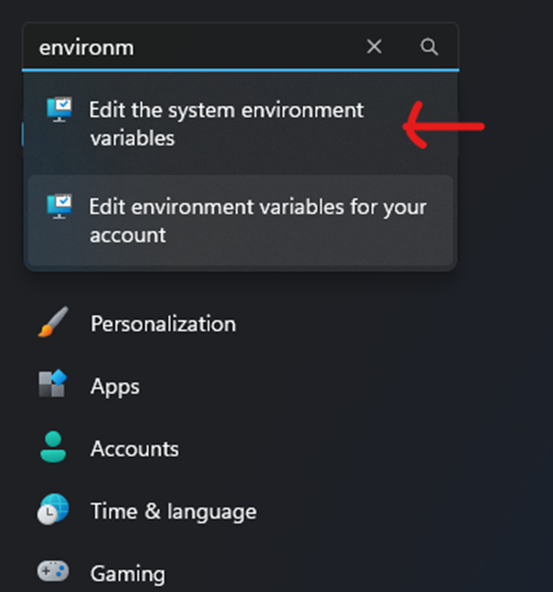
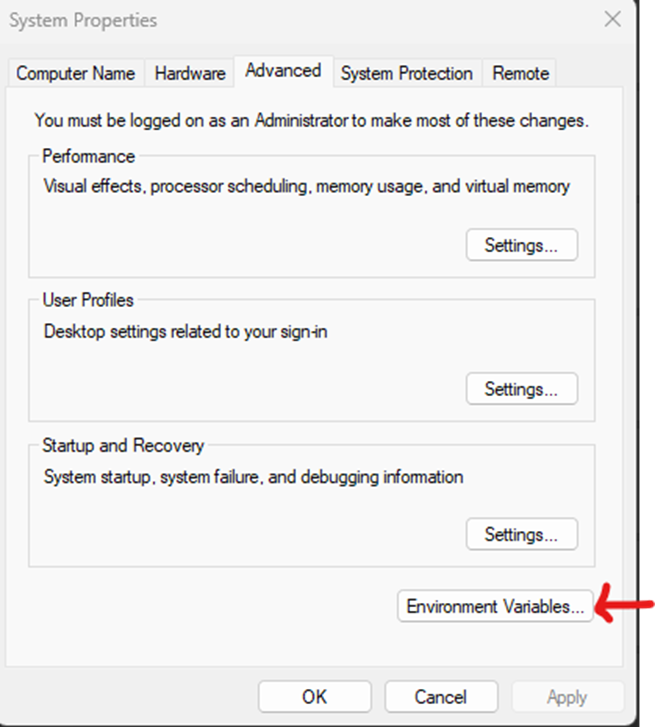
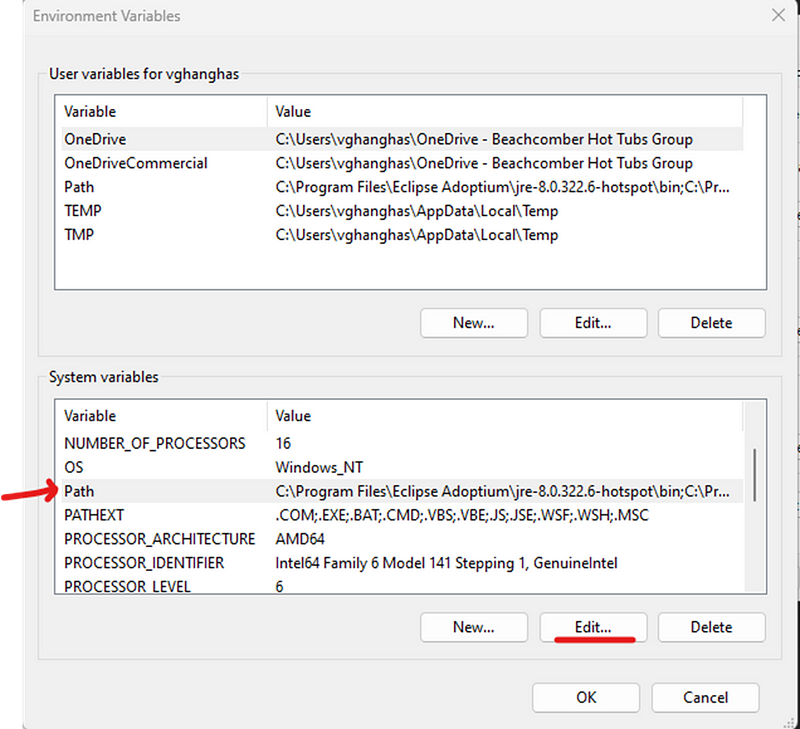
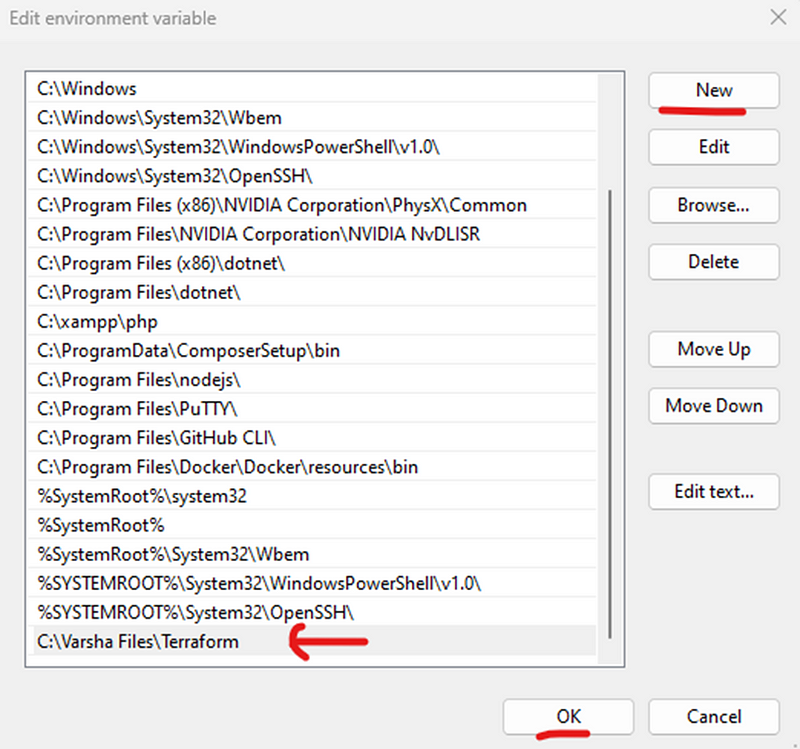
For windows follow:
Download the zip file from the above link and then go to your system setting-> search for environment variable and select and follow along
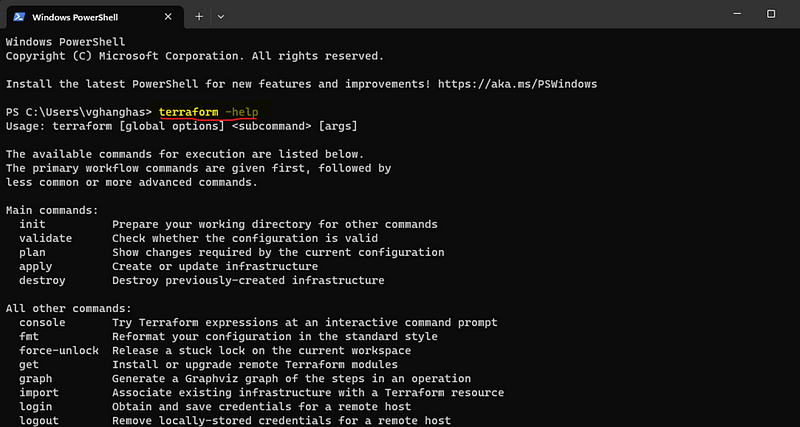
And you are ready to use Terraform. To test run the command
terraform -help
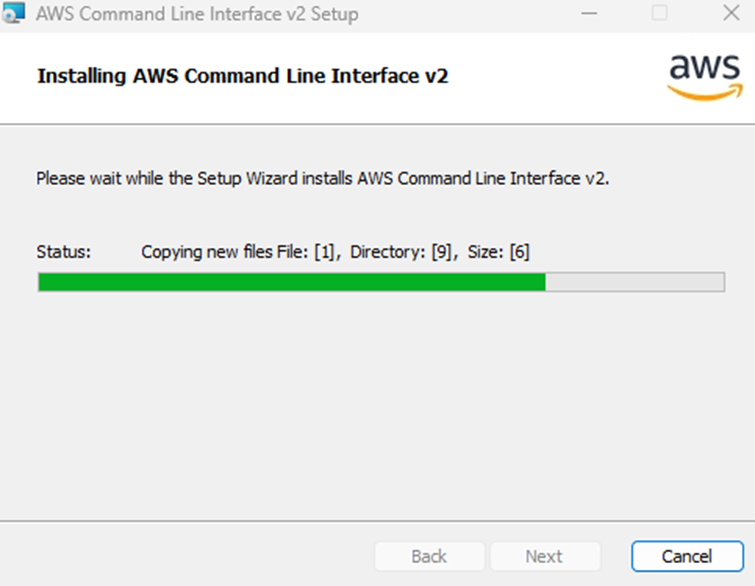
2. Install AWS CLI from here. Download setup and run
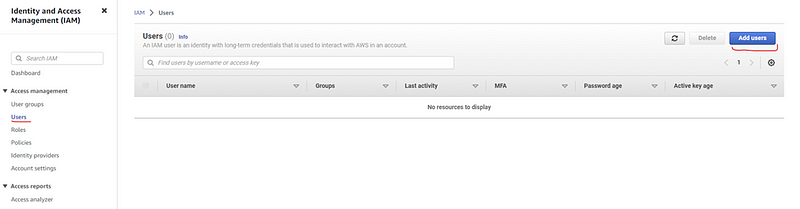
- Create an IAM user and generate an access key and secret key
Navigate to the IAM console, and click on Users.
Click Add user to create a new IAM user.
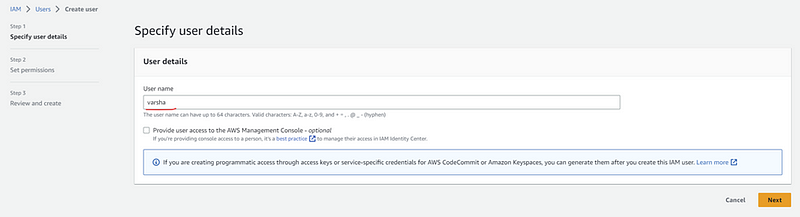
- Enter your username and click next
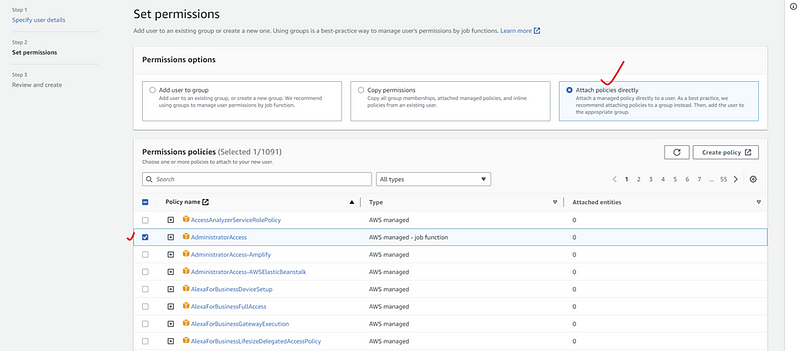
- On the “Set permissions” page, we can assign policies to the user. Select the appropriate policies.
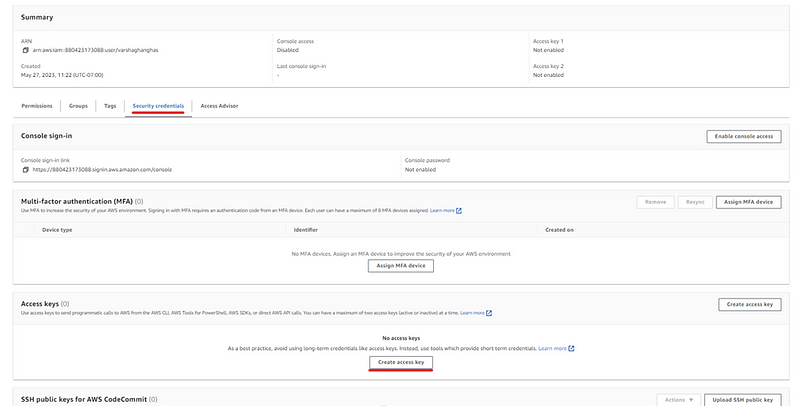
- Create access key by clicking the security credentials tab of user create.
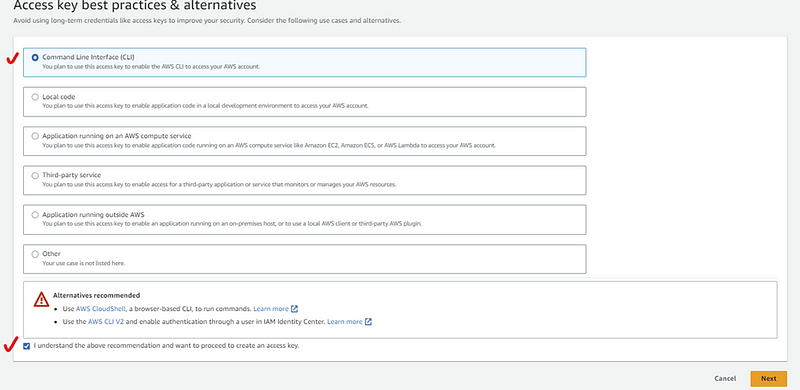
- Select CLI and click next
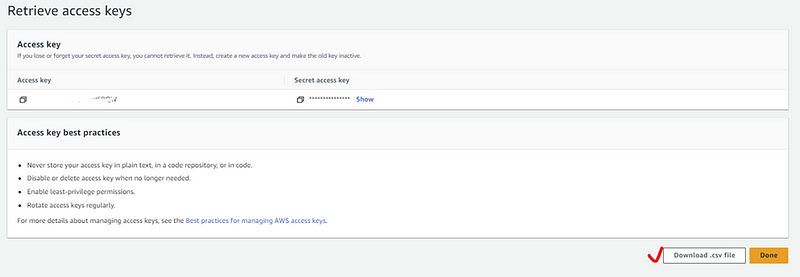
Select default and create access and secret keys.
Download CSV
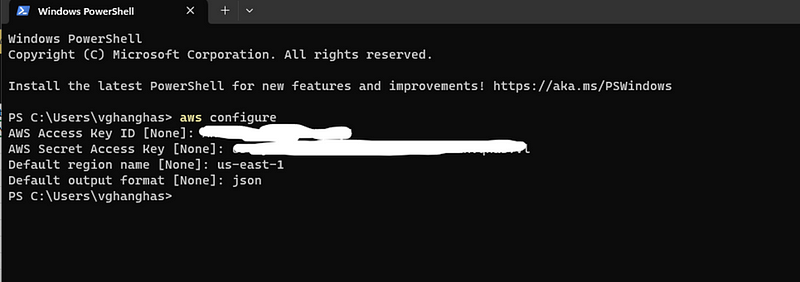
- Now configure AWS by using the command
aws configure
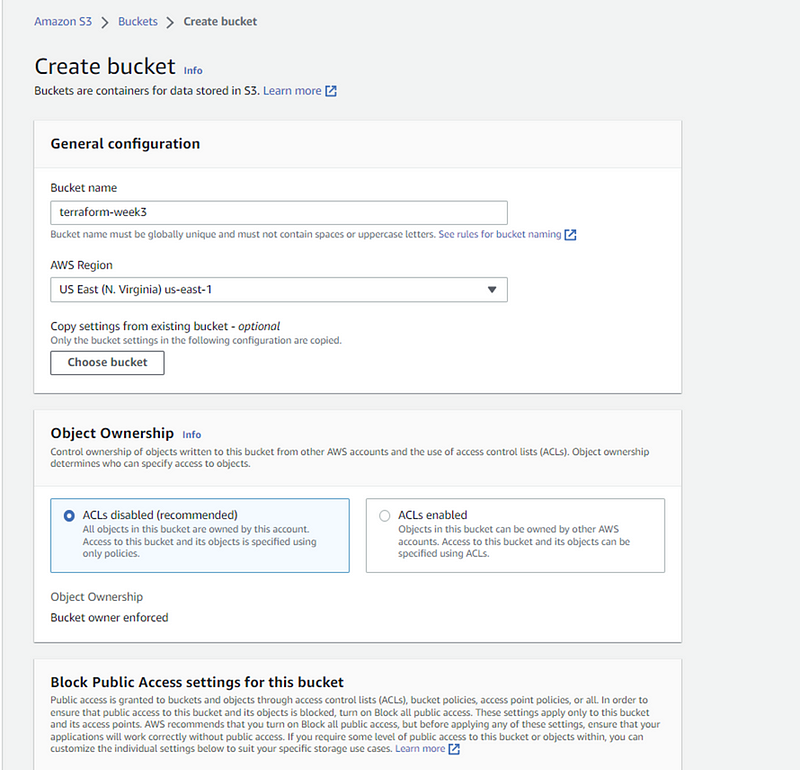
4. First we Create an s3 bucket to save the state file on a remote location
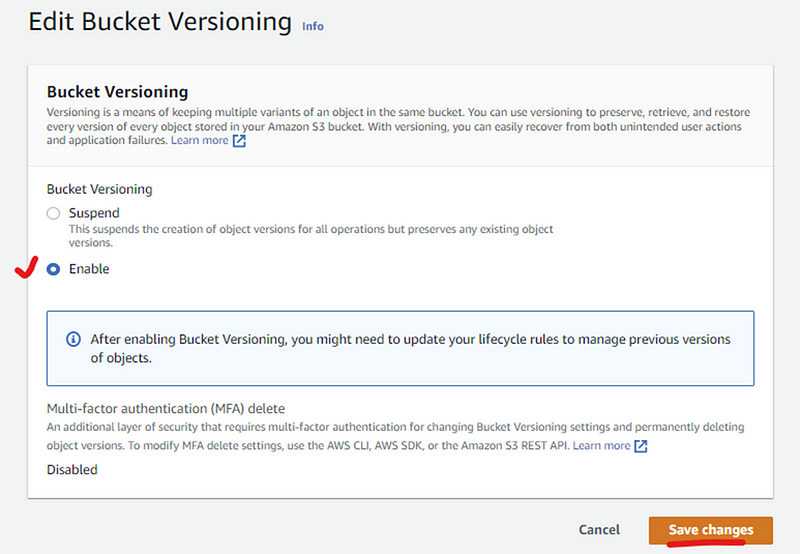
- Enable bucket versioning for backup

State-locking so that we can keep tfstate file consistent while working on a collaborative project.
Go to the DynamoDB service dashboard and click on create table button. Give your table name whatever you want but in Partition Key give the name LockID (NOTE: it is case sensitive) because then only DynamoDB will be able to lock the file and release the file and click create table button.


5. Now open VS Code and install Terraform extension
6. Now we will start creating the terraform files to implement the two-tier architecture.
Go to VS code and create a directory two-tier-aws-architecture-using-terraform and create a folder named modules in create the following files
Git repo to all terraform files
Fill the variables in the following file carefully i.e. terraform.tfvars
aws_region = “us-east-1”
env = “week3”
vpc_cidr = “172.16.0.0/16”
public_subnet1_az1_cidr = “172.16.0.0/24”
public_subnet2_az2_cidr = “172.16.1.0/24”
private_subnet1_az1_cidr = “172.16.10.0/24”
private_subnet2_az2_cidr = “172.16.11.0/24”
ami = “”
instance_type = “”
ec2_name = “”
ssh_key = “”
db_name = “”
db_username = “”
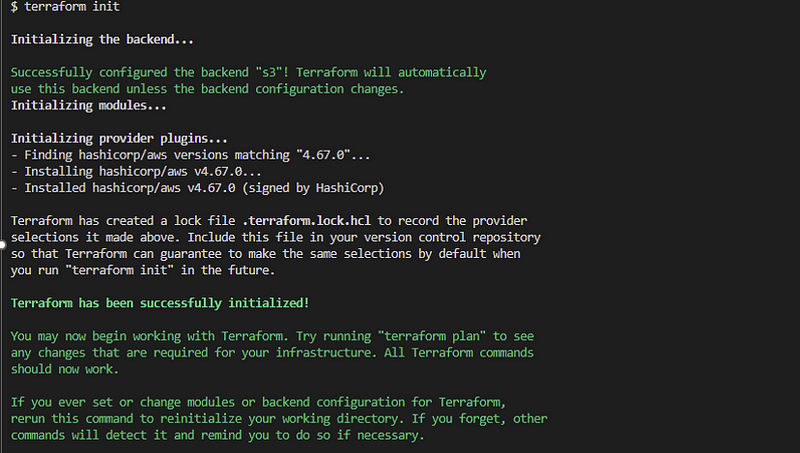
- After creating all files open the terminal and run terraform init
Now run ssh-keygen.exe and it will ask to name your keys, and enter name to create a public and private key.
Now run the command terraform plan and on a prompt enter yes.
After the plan is executed run the command terraform apply and on a prompt enter yes.
Outputs
- Check your AWS console you will see the two-tier architecture is created


- Don’t forget to destroy all services. Run command terraform destroy to destroy all services created for two-tier architecture.