Creating a Highly available, Fault Tolerance and Secure AWS 3-Tier Web Architecture


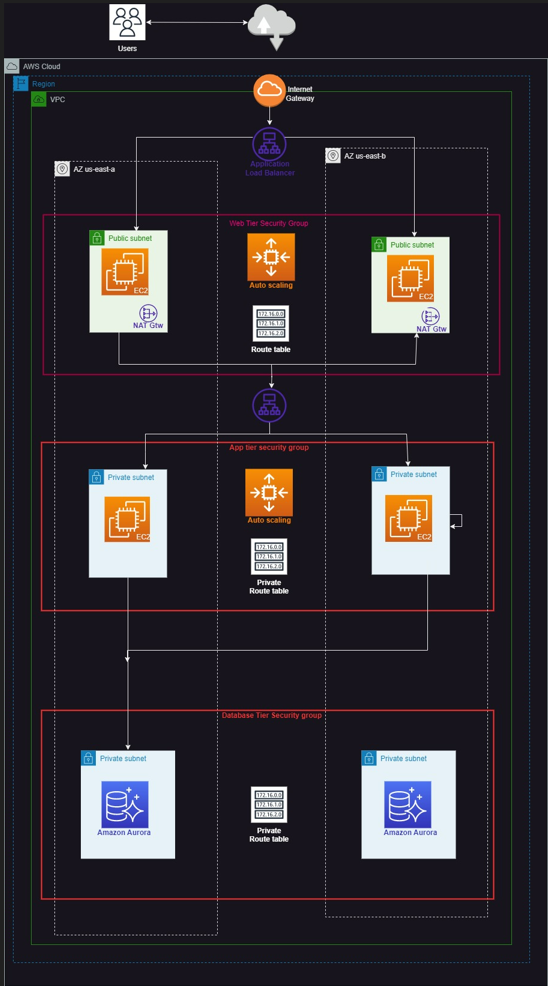
3-Tier Architecture
Introduction:
A 3-tier architecture is an implementation of client-service software design. It consists of 3 different tiers that link together and provide different functions. Three different tiers are user interface/presentation tier, application tier and database tier.
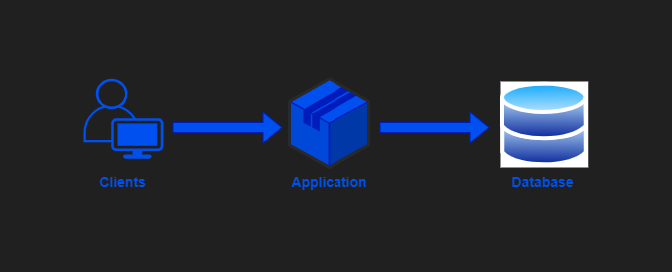
Presentation Tier:
The presentation tier is top level of application, that sends content to browsers in the form of HTML/JS/CSS and displays the result in form of a GUI(graphical user interface), which can be accessed by users directly. This might leverage frameworks like React, Angular, Ember, Aurora, etc.
Application Tier:
The application tier also called logic/business tier. It processes the logic for the application and uses application server. It builds a bridge between presentation and data layer to make faster communication. This might be written in C#, Java, C++, Python, Ruby, etc.
Data Tier:
Data tier is a database management system that provides access to application data. This could be MSSQL, MySQL, or PostgreSQL, etc.
Now lets create this three-tier architecture.
High Availability (HA) allows services with critical importance to be “always” online and undisturbed, regardless of location or external situation. Even if some of the system components fail, the system will continue to provide services and applications.
Scalability is the property of application to handle a growing amount of work by adding resources to the system. In other words, a scalable architecture supports higher workloads without any fundamental changes to it.
Fault Tolerance is a process that enables an operating system to respond to a failure in hardware or software. This fault-tolerance definition refers to the system’s ability to continue operating despite failures or malfunctions.
VPC
Amazon Virtual Private Cloud is a virtual network that closely resembles network that you’d operate in your data center. With Amazon VPC you can launch AWS resources in a logically isolated virtual network that you’ve defined.
Creating a VPC
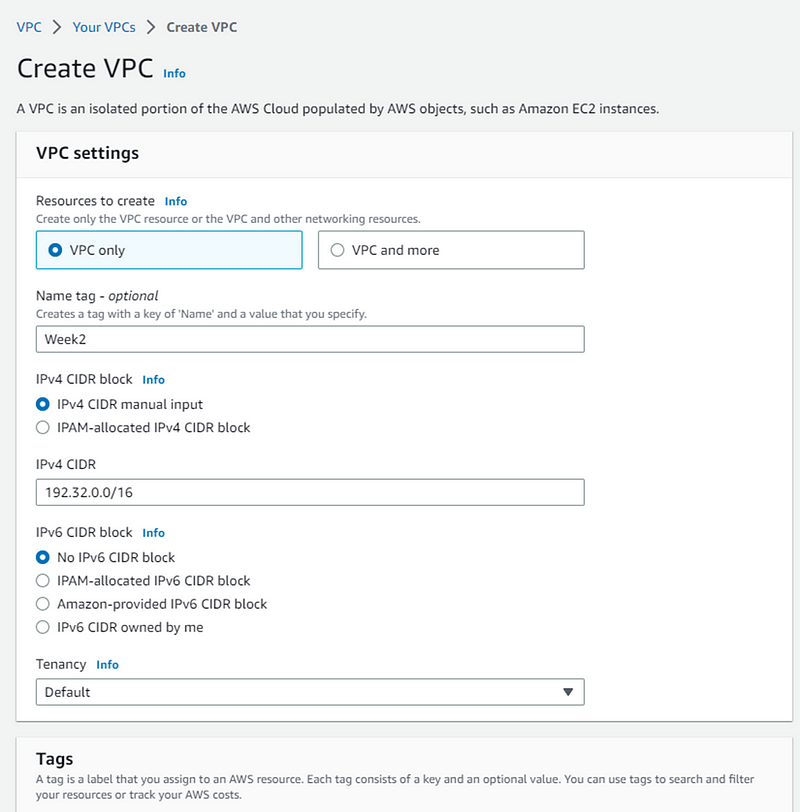
To create VPC goto AWS console and search for VPC and click button Create VPC.

Give your VPC a name and IPv4 CIDR address and create VPC.
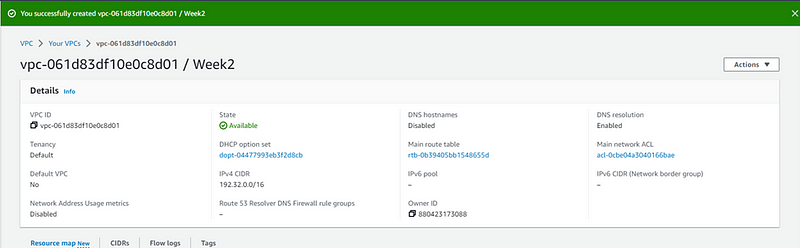
Your VPC has been created.
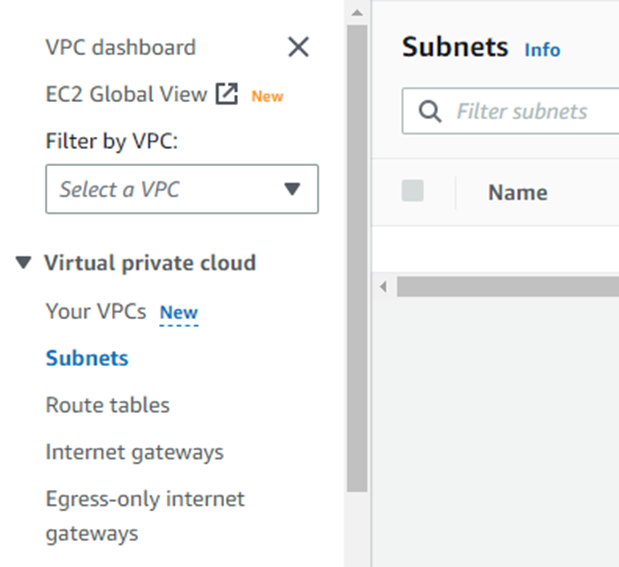
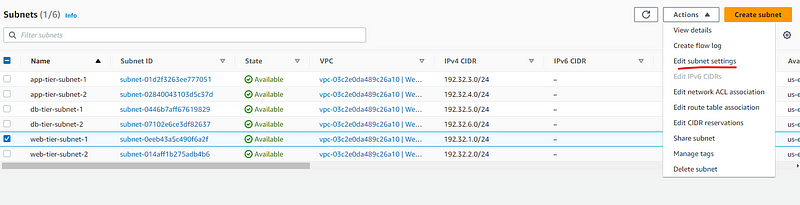
Subnets
Now we will create Subnet. To create subnet go to VPC dashboard and click on Subnets and click create subnets.
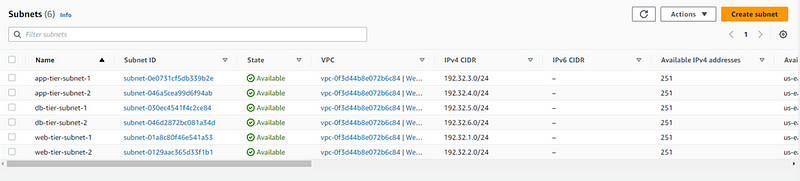
We create 6 subnets here: 2x3 for each tier.
2 Public subnets for Web Tier.
2 Private subnets for App Tier.
2 Private subnets for Database Tier.

Select VPC you created earlier.
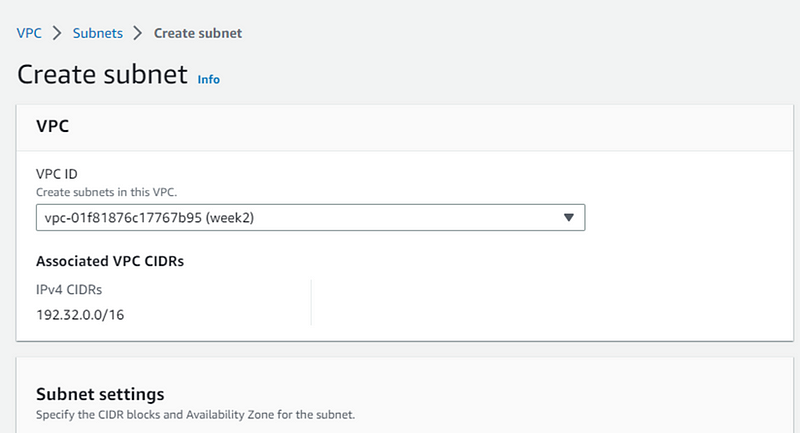
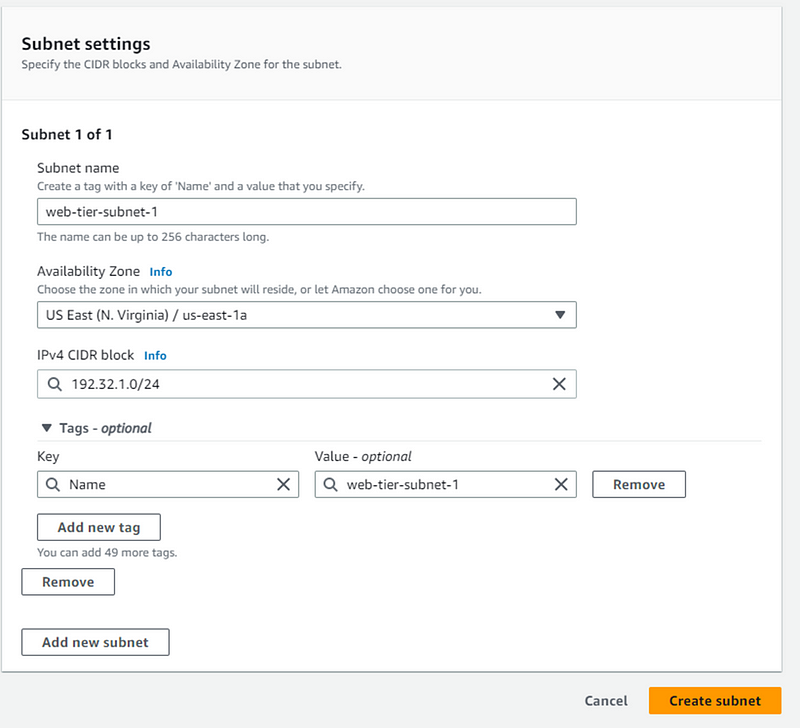
Give your subnet name and choose Availability Zone (AZ). Remember we need to create subnet for 2 different AZs. Now we are creating subnet-1 for AZ-a. Fill details and click Create Subnet.
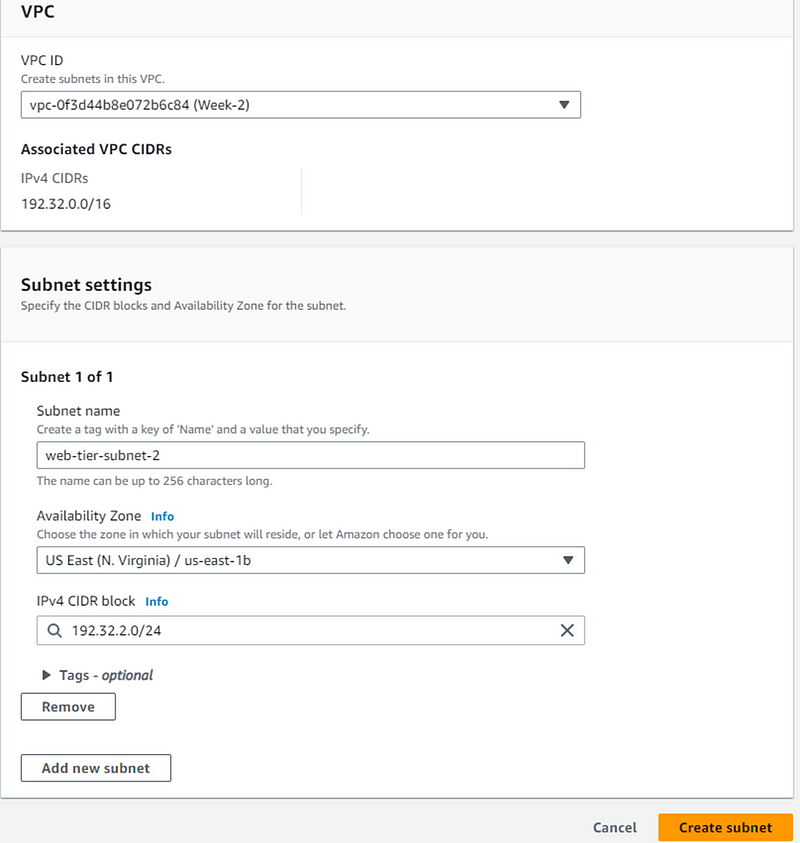
Now we create another subnet for AZ-b
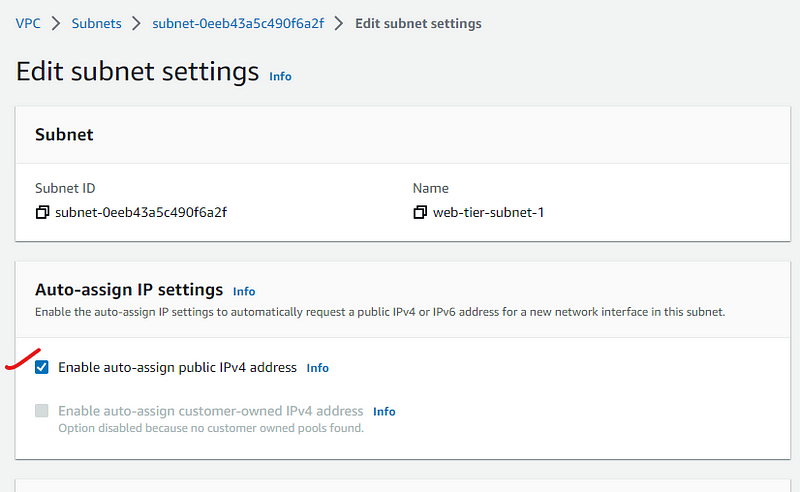
We will enable auto-assign setting for IPv4 for subnets created for web-tier only.
We have create 2 subnets for Web Tier and now we will follow the same steps and create 2 subnets for App-Tier and 2 for DB-tier.
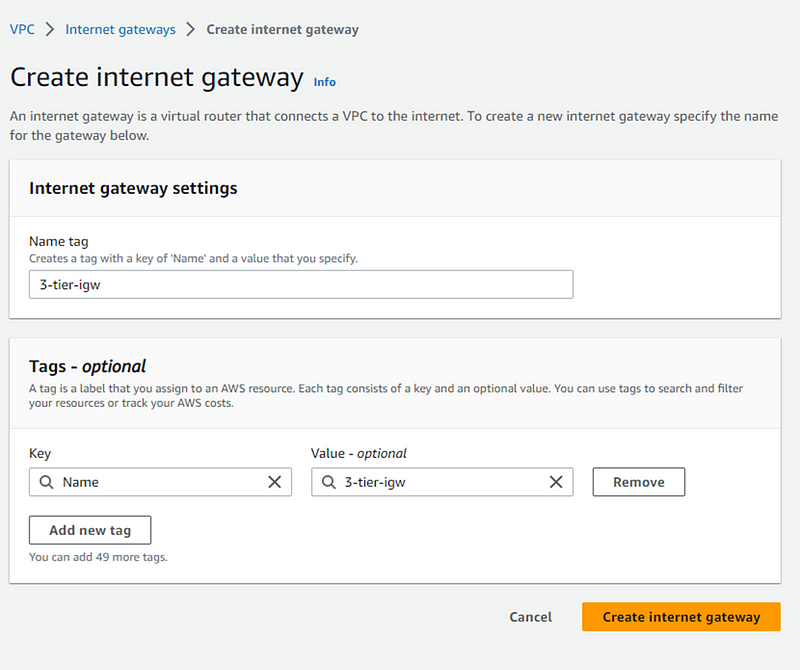
Internet gateway (IGW)
Now we will create internet gateway. To create IGW, go to VPC console and look for internet gateway in left menu and click Create internet gateway.

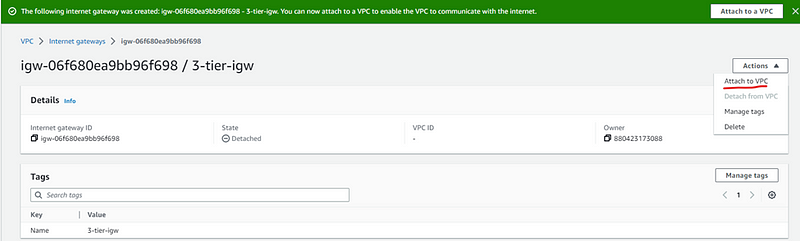
Give name to IGW and click button Create internet gateway.
After Internet Gateway is created, it needs to be attached to the VPC we created earlier i.e. Week2 VPC. For that Click VPC->Internet Gateway->Actions->Attach to VPC.
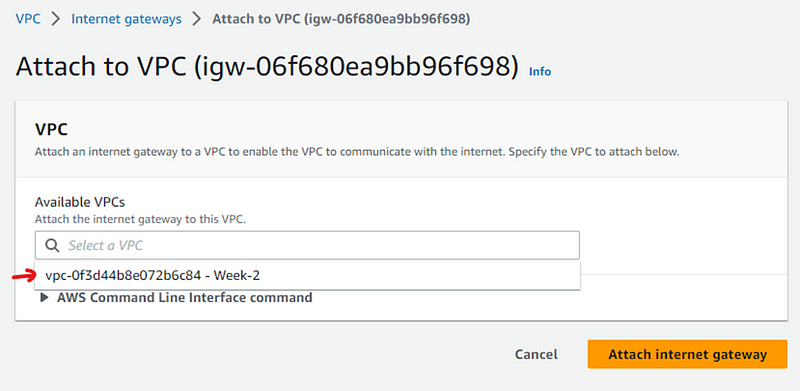
After that you will redirect to next screen where you can select VPC to attach and click Attach Internet gateway.
NAT Gateway
Now we create NAT gateway. For creating NAT gateway, look for NAT gateway in VPC console and select option NAT gateway and click Create NAT gateway.

Name your NAT gateway, select web-tier-subnet and click Allocate Elastic IP to allocate it automatically.

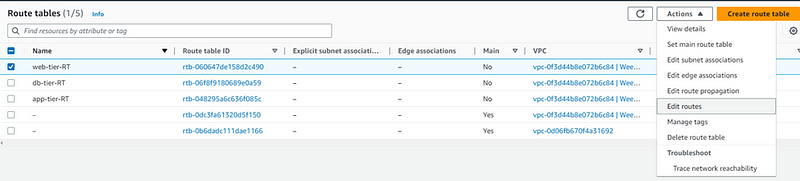
Route Table (RT)
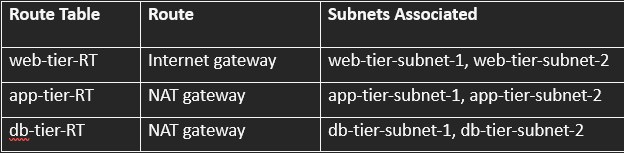
Now we create route table for 3 web tier.
A public route table for web-tier
2 private route tables for app-tier and db-tier. One RT for each.
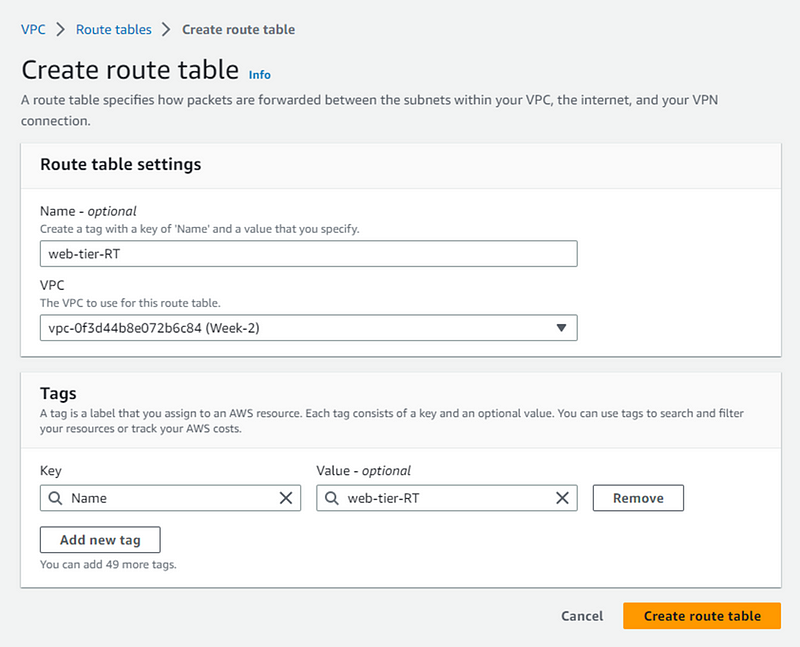
To create route table look for route table in VPC console and click it. Then click on Create route table button.

Name your route table, select VPC and create.
Now we will follow the same steps to create 2 more route table for app-tier and db-tier.

Our route table created now.
Associate Subnets, Internet gateway and NAT gateway with Route Tables
Now we will associate the subnets, IGW and NAT gateway to their respective route tables.
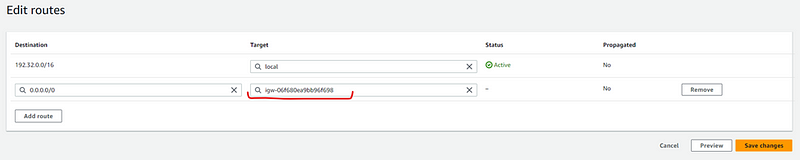
Now Select a Route table and from actions click Edit routes and then click Add route.
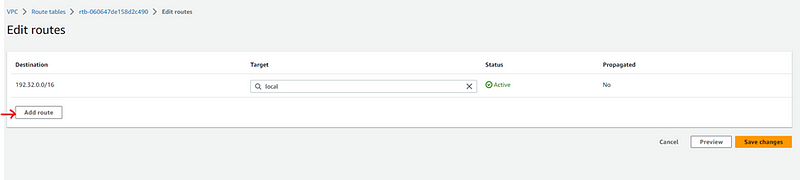
Select Internet Gateway you created earlier and click Save changes
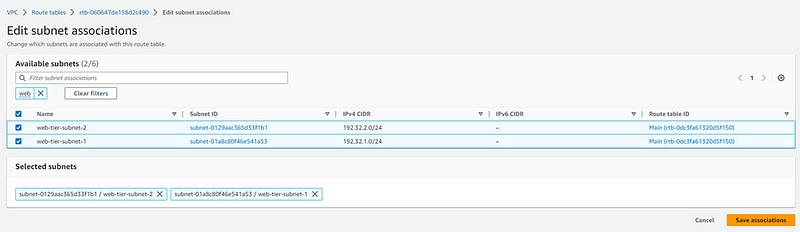
Now we will associate subnet in route table
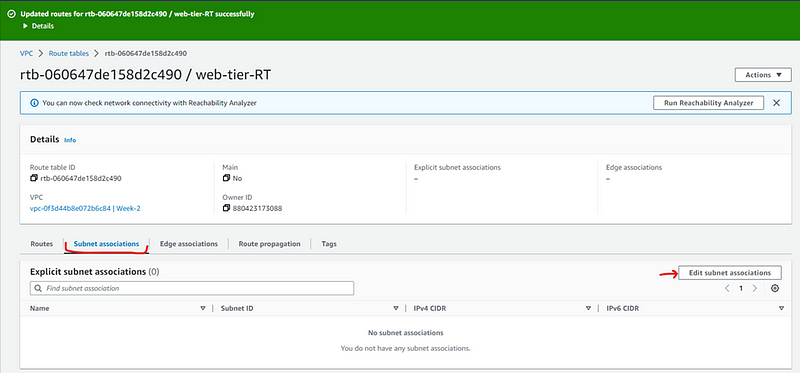
We will associate web-tier subnets only here as we have selected web-RT.
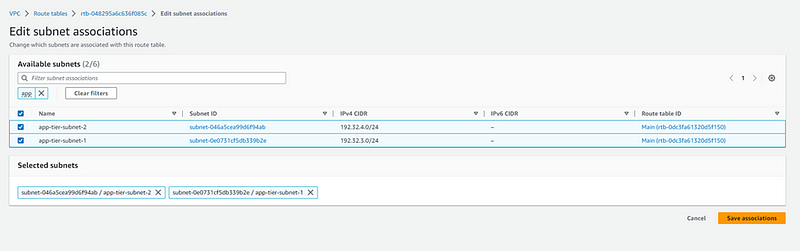
Like this we will add route in route table for app-tier and db-tier and associate app-tier-subnets and db-tier-subnets respectively.
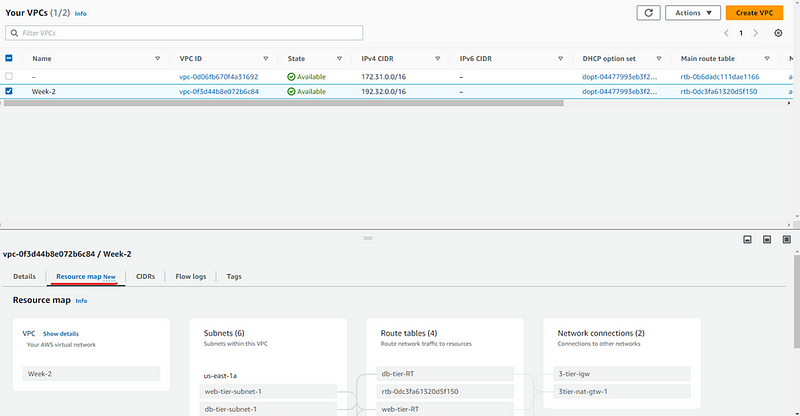
After all subnets are associated with route tables. Now you can see your mapping by going to you VPC-> select VPC -> Resources map
Elastic Load Balancing (ELB)
Lets create Application Load Balancer.
In AWS console, search for EC2 and click it.
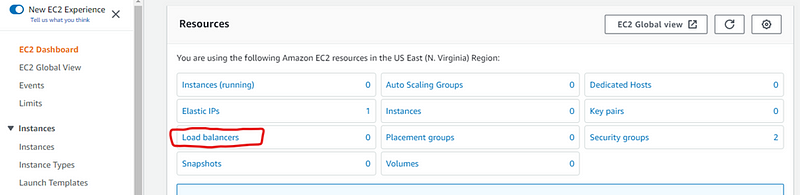
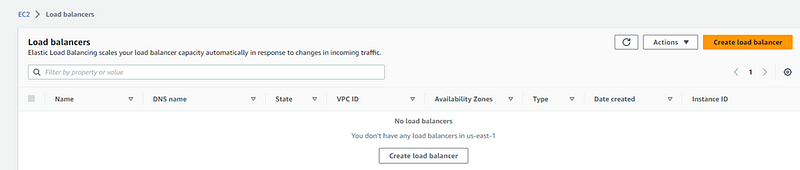
Click Load balancer from EC2 dashboard.
Click Create load balancer button
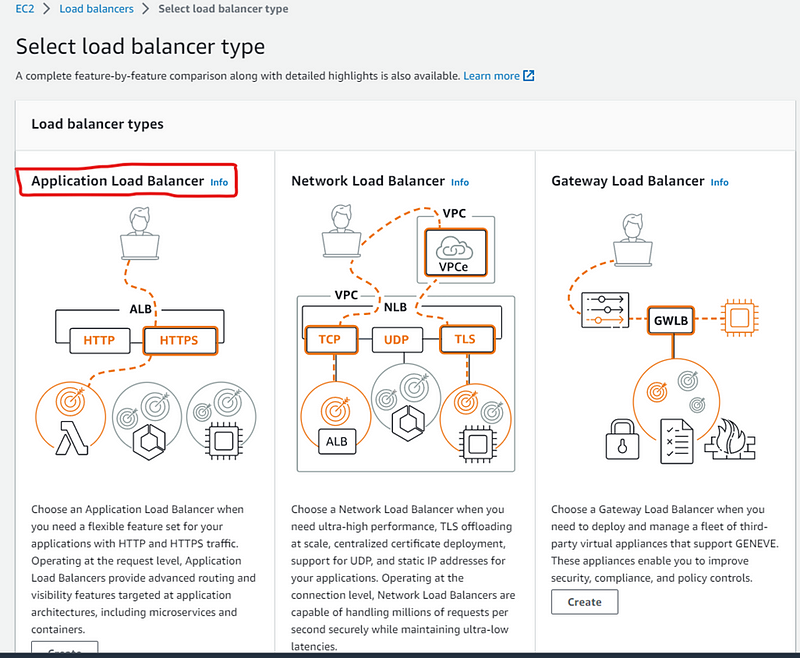
Select Application load balancer and click Create
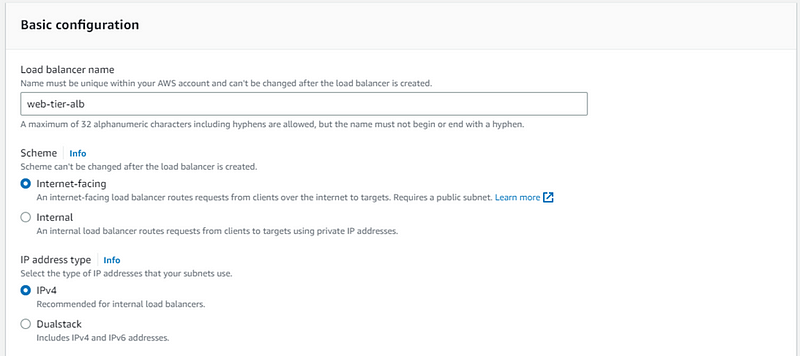
Add name of your Application Load balancer and choose the following
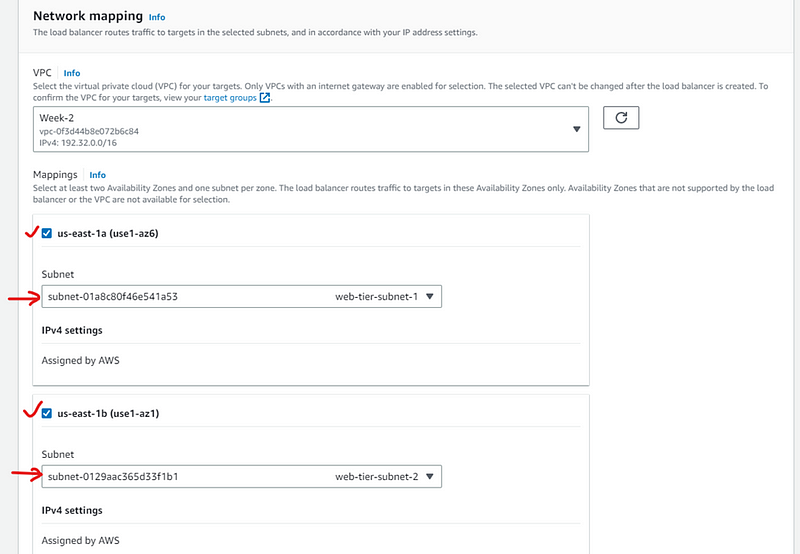
In Network mapping, select your VPC, Mappings-> select each Availability zone and their associated subnet i.e., web-tier subnets.
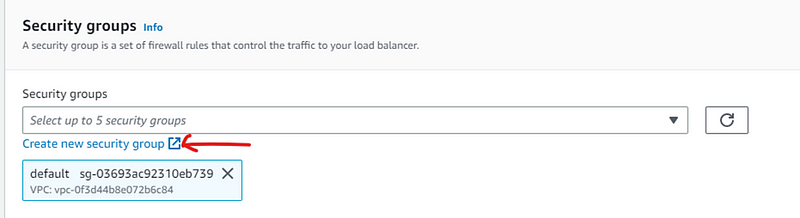
Security groups: create a new security group (this will open in new tab)
Add name and description to your security group and select VPC
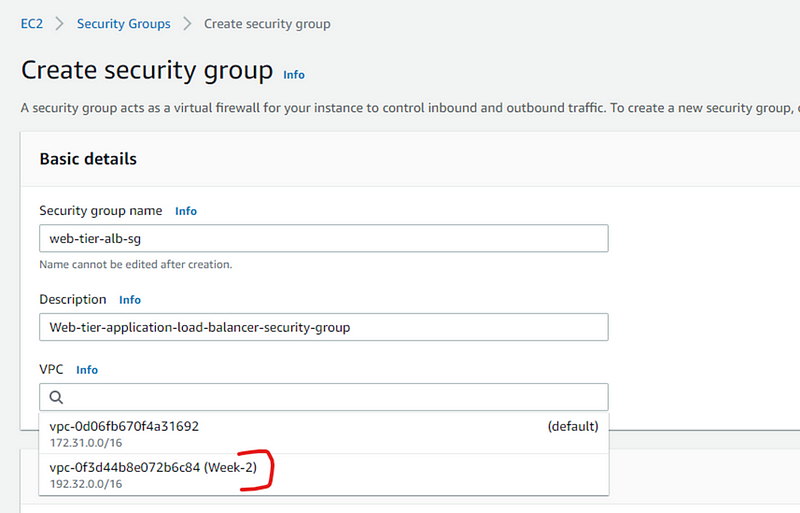
Add inbound rule, that must be configured to allow IPv4 traffic through port 80(HTTP).

We will leave other options as default and click Create security group button.
Now go to previous tab and select the selected security group, next add Listener and routing info
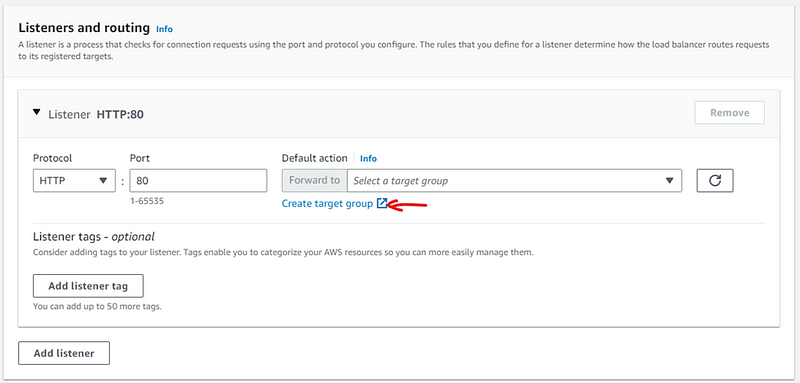
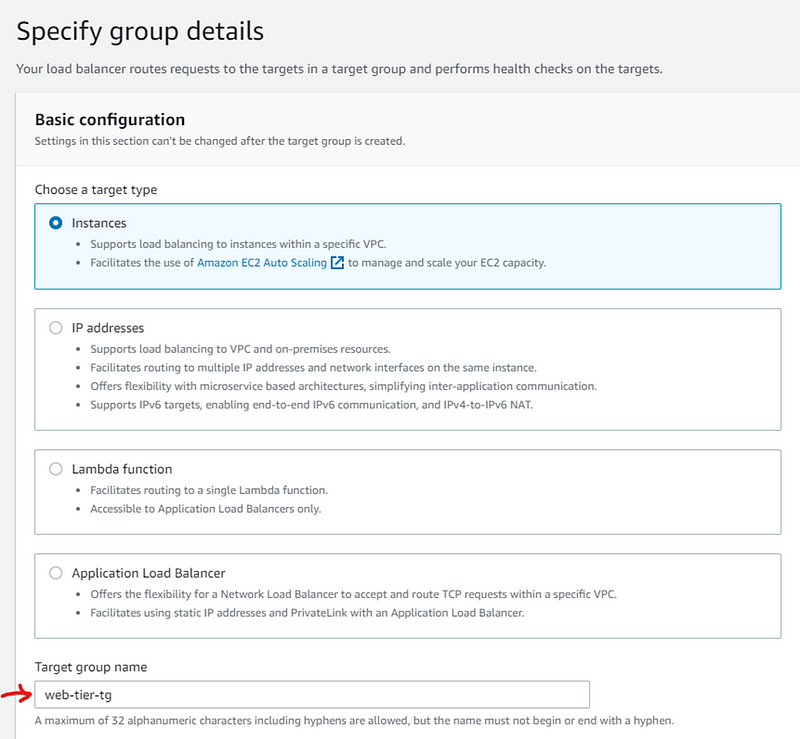
Here we create target group (this will open in next tab)
Select Instances and add target group name and select all other default settings and click Next and then click Create Target group button.
After creating target group go back to previous tab and select target group
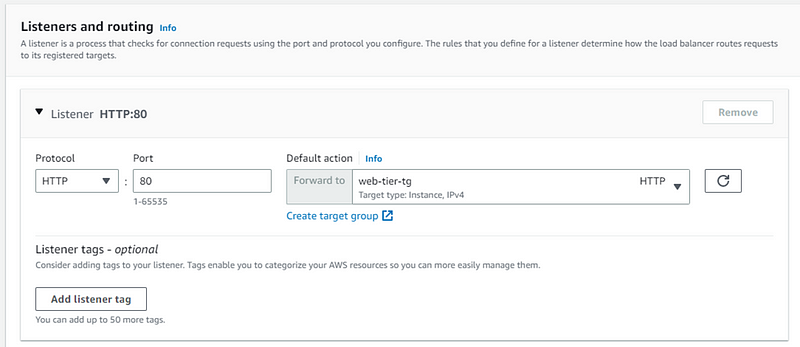
Keep all other settings default and scroll down and click Create load balancer button.
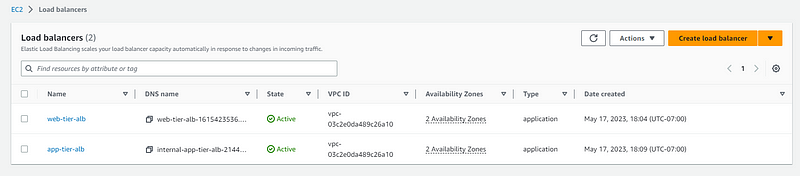
Now we will create application load balancer for app-tier:
Follow same steps but in Scheme select Internal.
In network mapping select app-tier-subnets for each AZ.
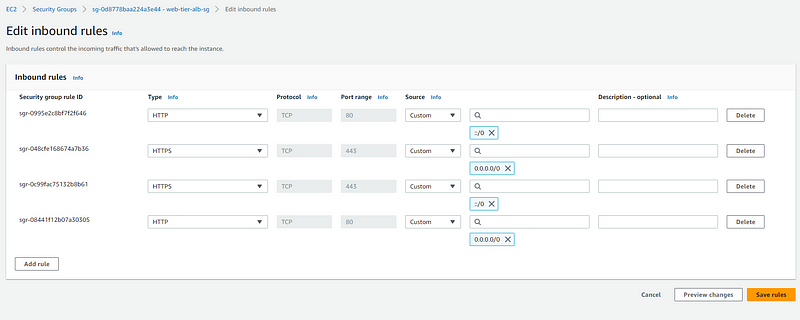
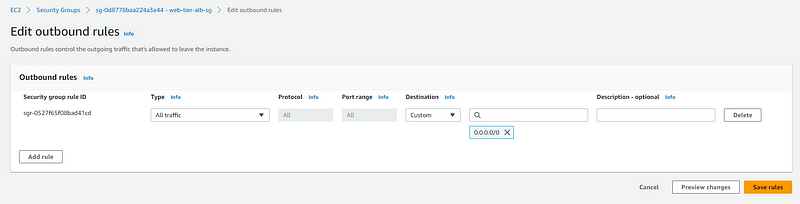
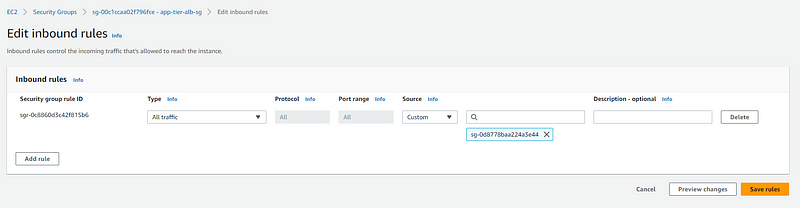
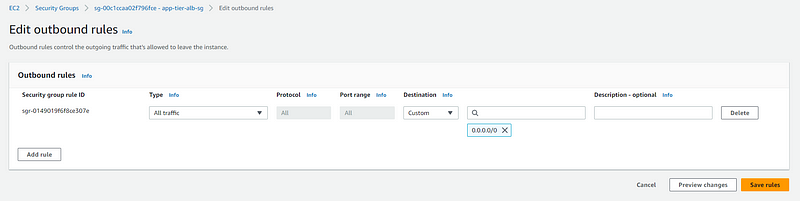
After both load balancer created lets check the inbound and outbound rule.
Select one security group and click Edit inbound rule
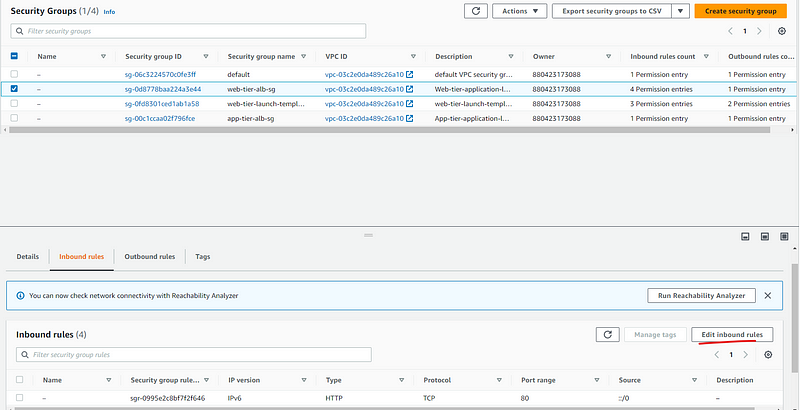
Add following rules for web-tier security group and click save changes
Outbound rule for web-tier
Inbound and outbound rules for app-tier-security-group
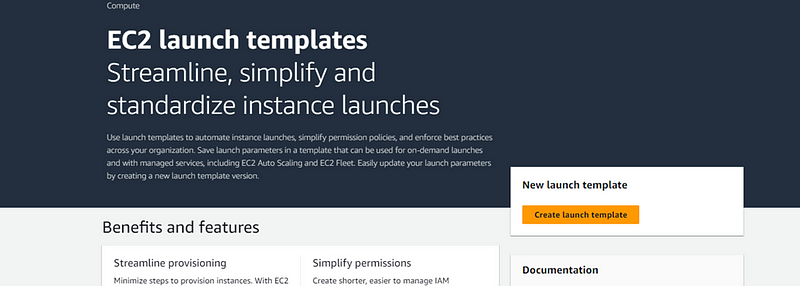
Configure Launch Template
To create launch template go to EC2 console and look for Launch Templates and select. Now click Create launch template.
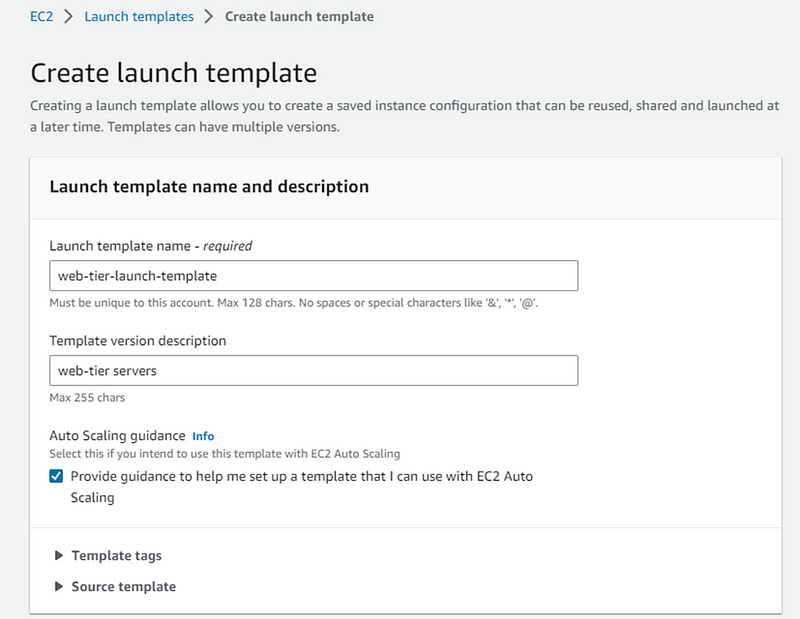
Create launch template for web tier:
Give name to your web-tier launch template and description.
Check the box under Auto Scaling guidance option.
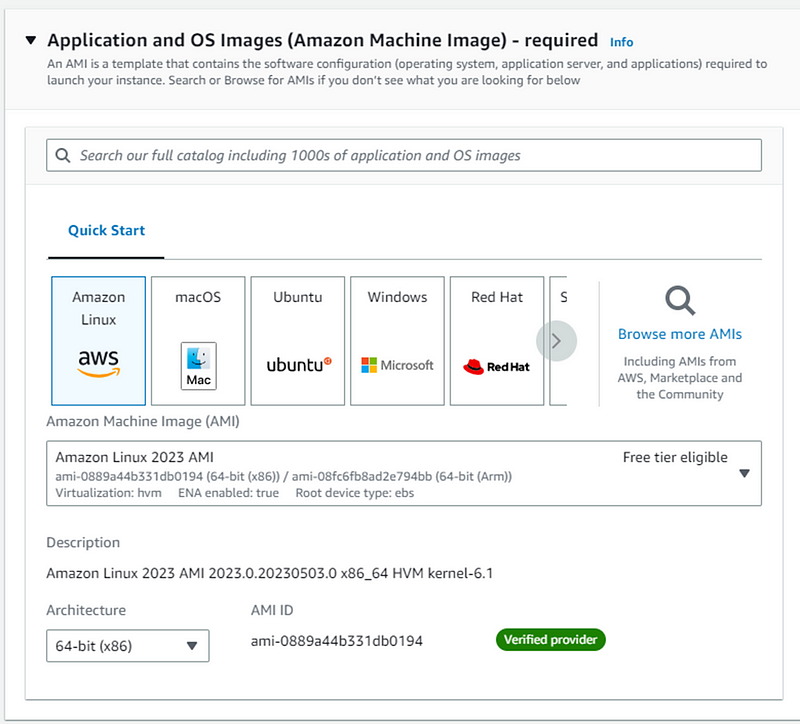
- Select Amazon linux AMI for Application and OS Images (Amazon Machine Image).
- Select t2.micro Instance type and create key pair for login.
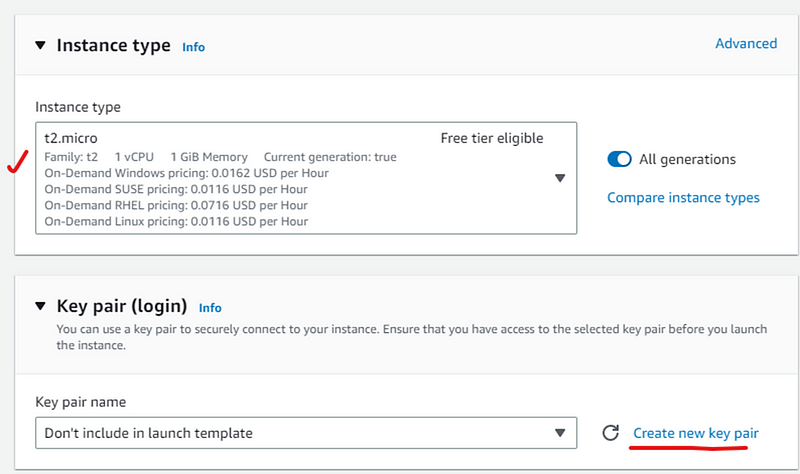
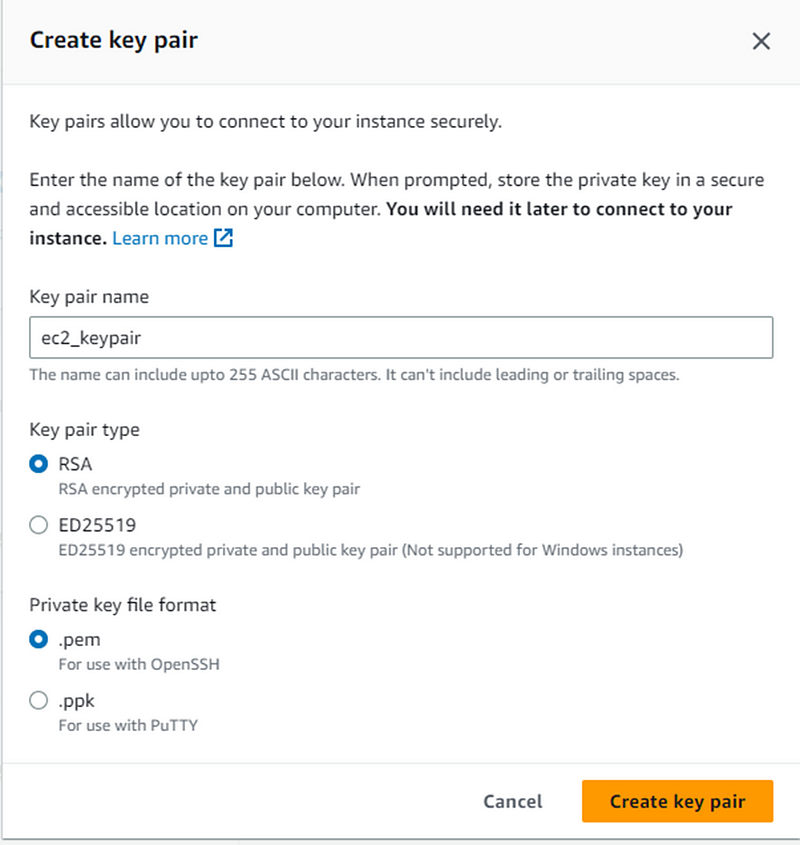
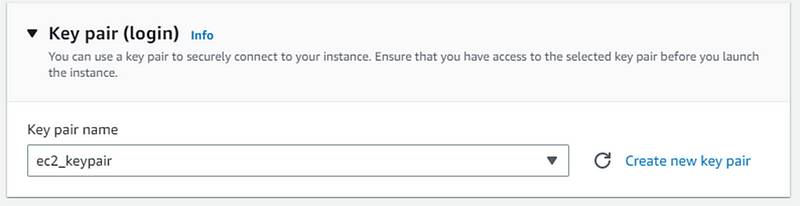
- After key create select key pair.
In Network security: select Create security group and name security group and select VPC.
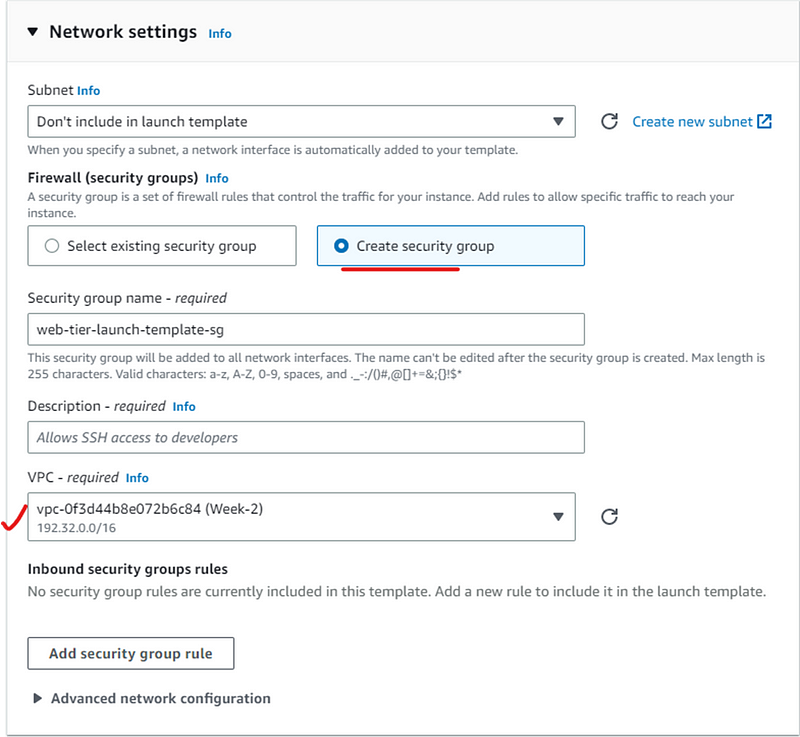
Click Add security group role and create a new security group for web-tier-template and come back after security group created.
Now select security group from existing security group.
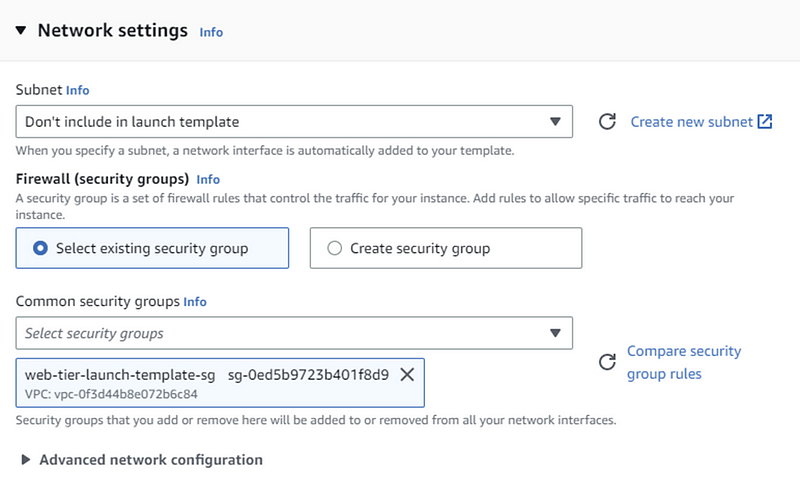
In advance network configuration click Add network interface.
- Enable auto-assign public IP.

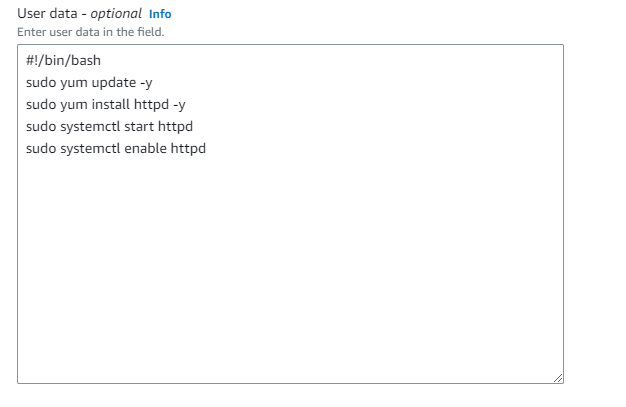
In advance details got to user data option and add following commands and create template.
#!/bin/bash
yum update -y
yum install httpd -y
systemctl start httpd
systemctl enable httpd
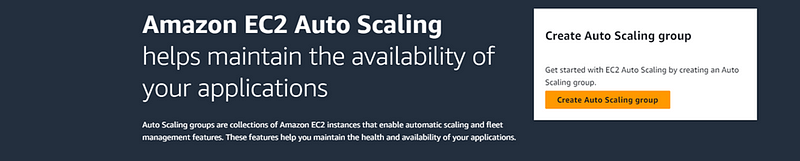
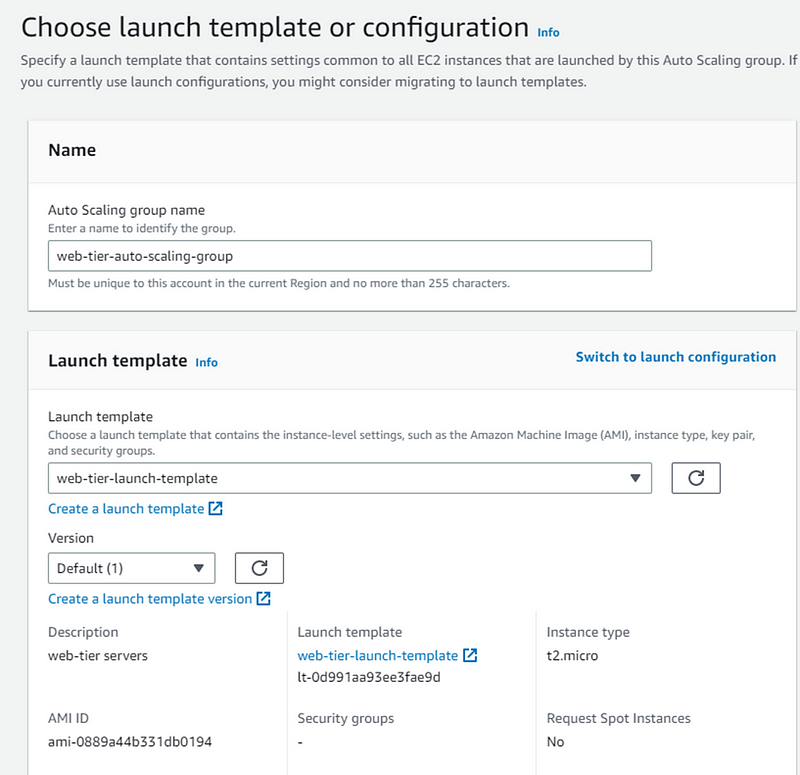
Auto Scaling Group (ASG)
To create Auto Scaling Group, navigate to EC2, in left menu at bottom you will find auto scaling group option, click that and then click Create Auto scaling group button.
Now enter your auto scaling group name.
In launch template select the template create earlier and click Next
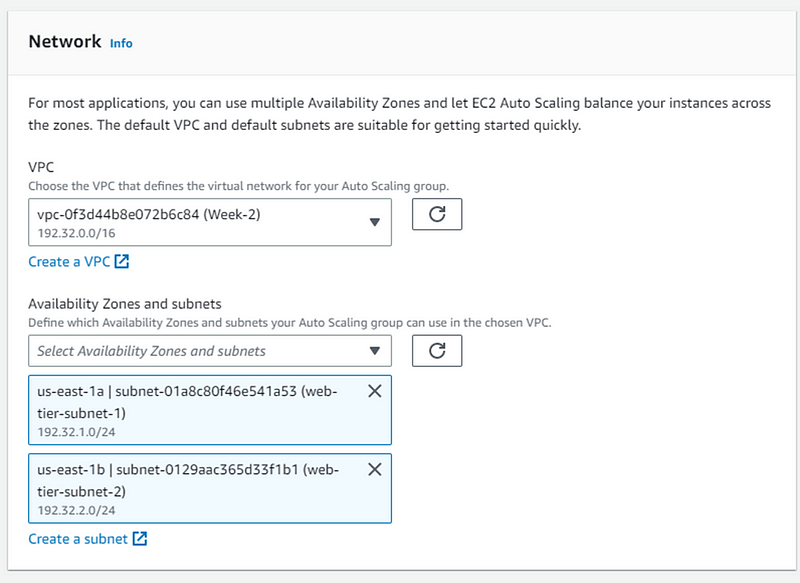
- In network select VPC, select AZ both web-tier subnets.
- click next and choose following
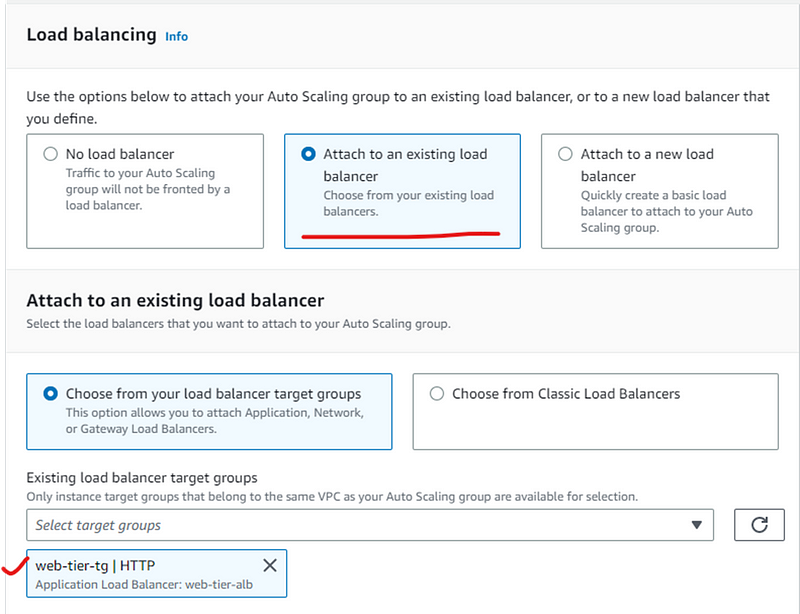
- Choose group size.

- Scaling policy-> select none and click Next and keep all as default and Create auto scaling group.
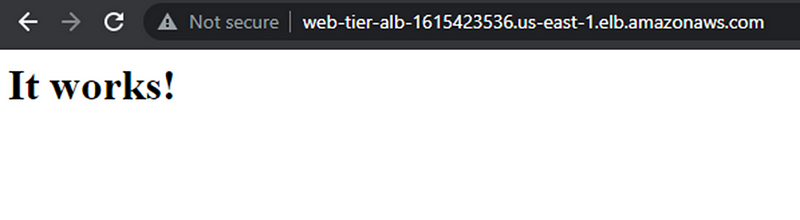
Now you can see that the instance is created in EC2 console. Goto load balancers-> select web-tier load balancer.
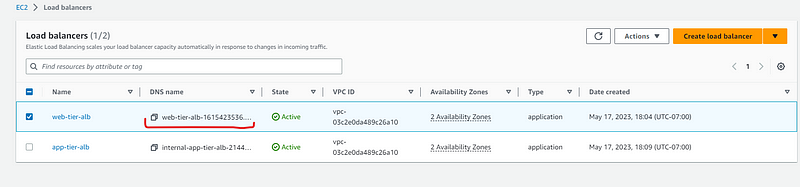
Copy the DNS path and open in new browser to check. It should work,
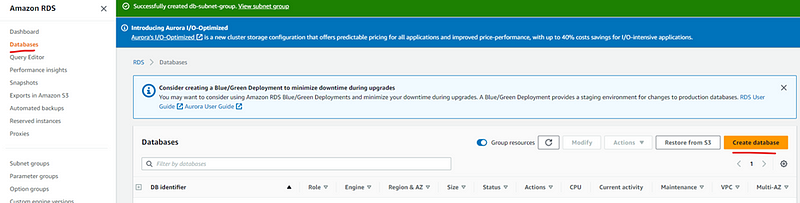
Database Tier
Let create database tier.
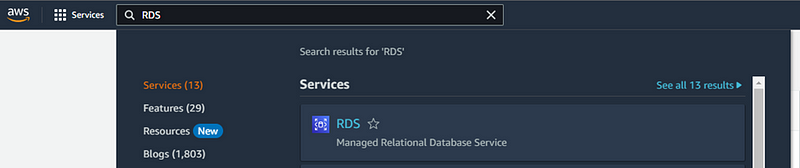
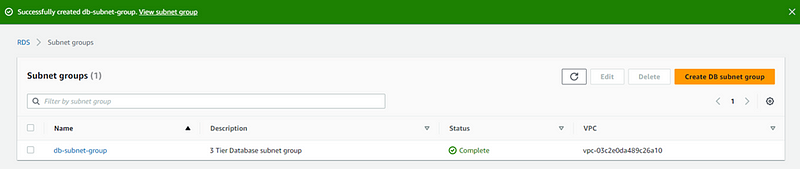
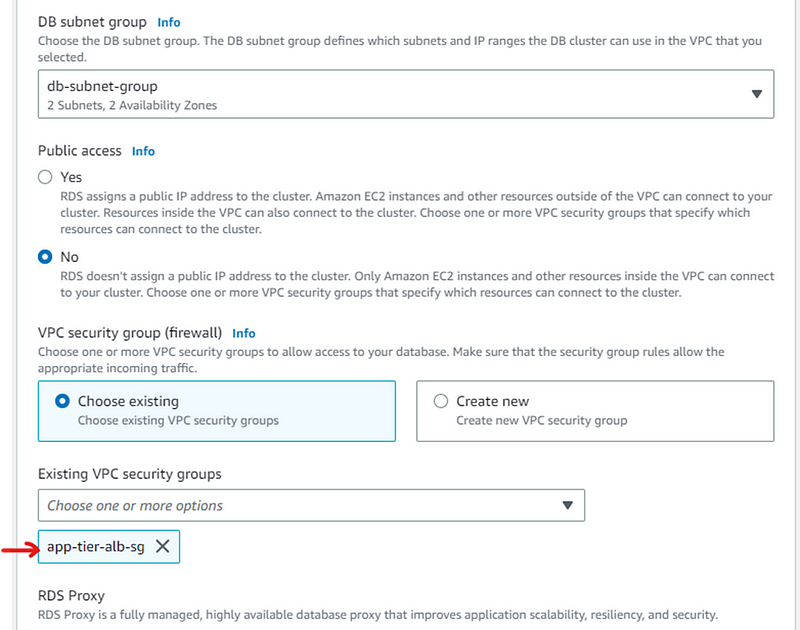
For that first we create subnet group for db-tier. In AWS console navigate to RDS and click RDS.
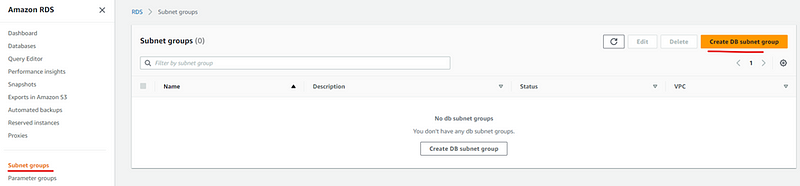
- Name the subnet group and select VPC from dropdown.

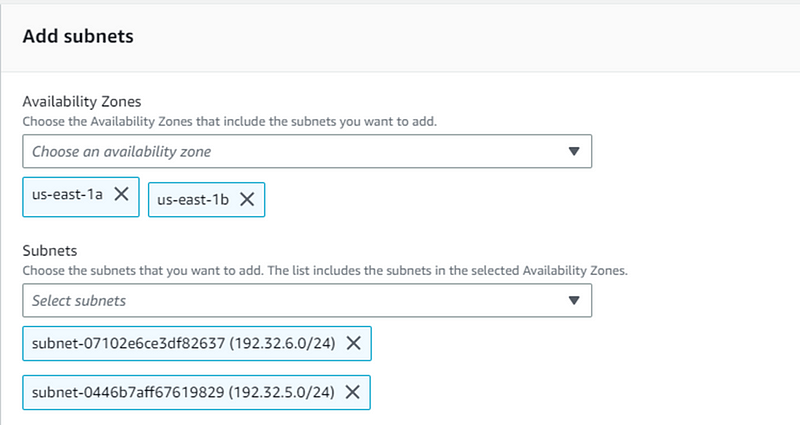
- In the Availability zone chose us-east 1a and us-east 1b. For the subnets we have to chose the one we created for our database. Once all these is done click on create DB subnet group.
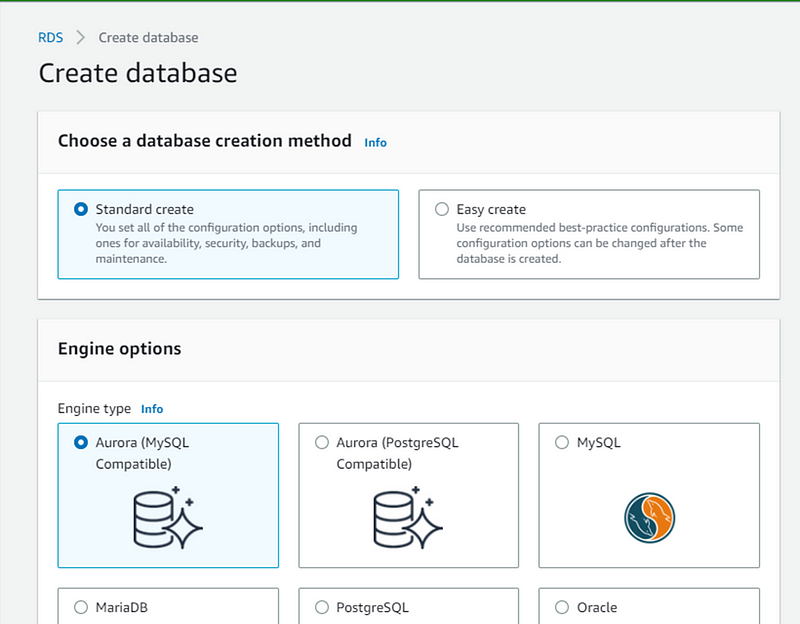
- Now we will create database.
- Select database like I selected Aurora (MySQL compatible)
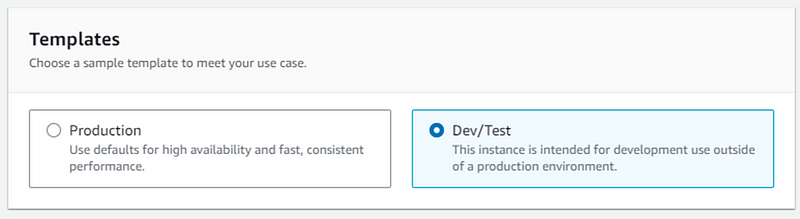
- Choose Dev/text and following setting as I did
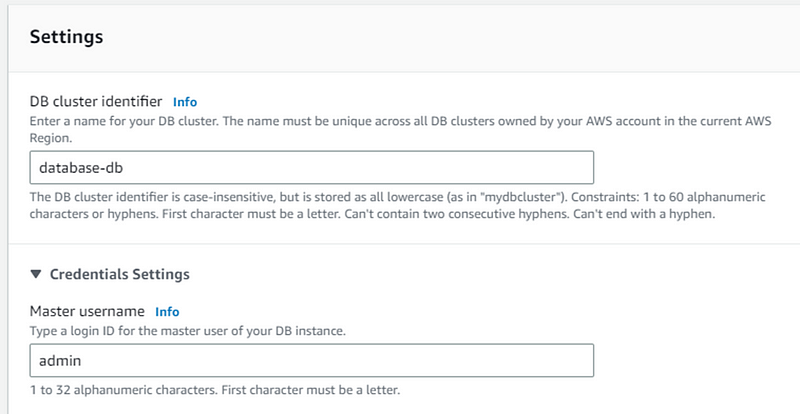
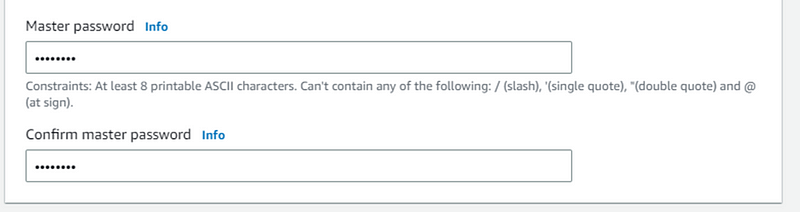
- Select password for master
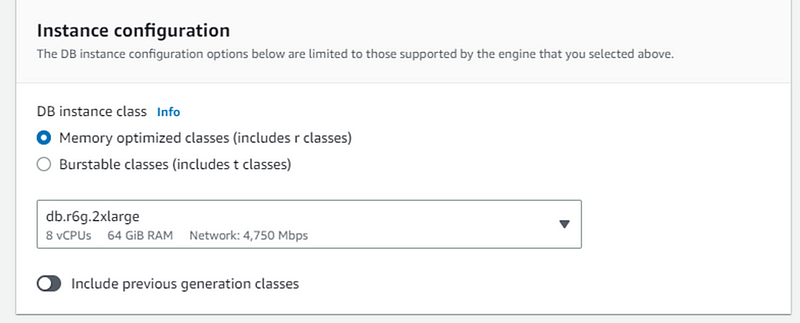
- Keep Instance configuration as default
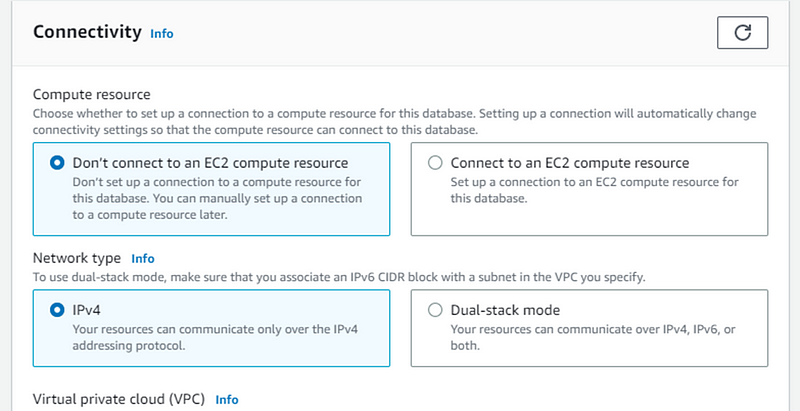
- Select security group- app-tier security group
- Keep other settings default and scroll down and click create database
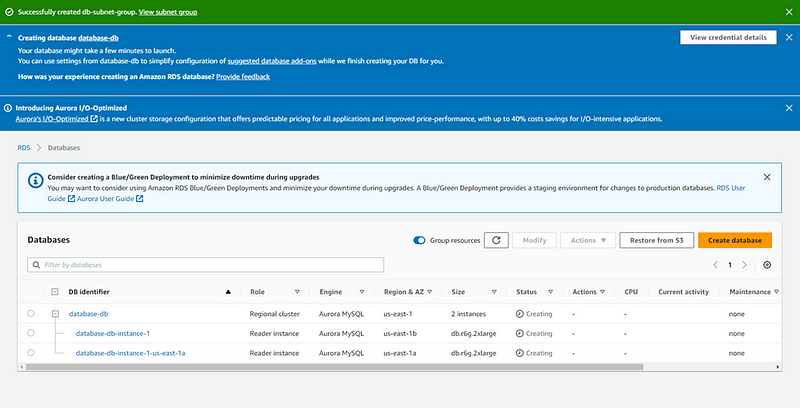
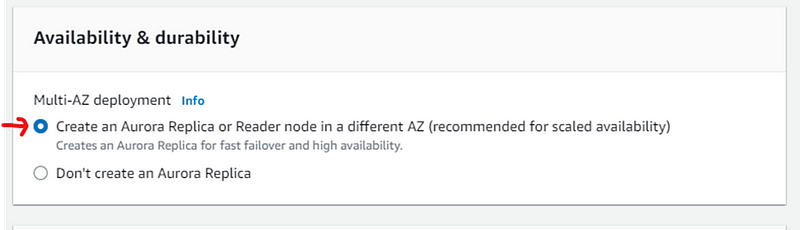
Our database has been created.
This will create two DB instance, one in each Availability Zone. One is set as writer instance in AZ-b and the other one is as reader instance i.e., AZ-a.
This gives our Database redundancy and high availability.
Here we have created our 3-tier Highly available, fault tolerance architecture.
Note: Please delete all services once you have created your 3-tier architecture to save any charges by AWS(free-tier servi).
#week2 #10weeksofcloudops
Refrences:
AWS Networking - AWS VPC, Subnets, Security Groups, NAT Gateway & IP Addresses
AWS Networking can be a complicated topic, but it's an essential part of building and managing resources on the AWS…dev.to
https://docs.aws.amazon.com/AWSEC2/latest/UserGuide/ec2-instance-connect-set-up.html